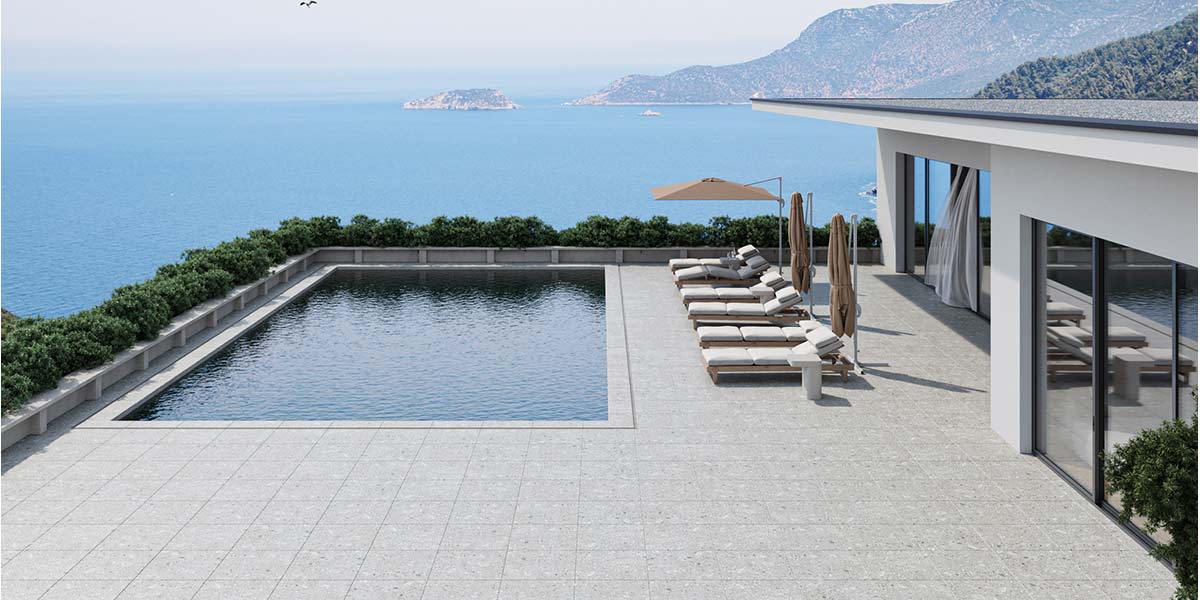
The most practical method of constructing an elevated rooftop deck is to use a floating roof deck system. With this system, porcelain pavers are supported by adjustable height deck pedestals which allows you to create a perfectly level, stable, level and visually appealing deck that can cover existing pipes, conduits etc. while preserving the roof’s waterproof membrane and structural integrity. Here’s how.
Floating Rooftop Deck Construction FAQs
Flat roofs, contrary to their name, usually have a slight slope (1-2%) to ensure proper drainage. This sloped surface can make traditional deck-building methods difficult because achieving a level surface becomes challenging. Additionally, building on a roof requires careful consideration of weight distribution, waterproofing, and the materials used to prevent damage to the roof membrane.
Adjustable height deck pedestals address these challenges by providing a stable base for porcelain, concrete or wood pavers that compensates for the roof’s slope without directly fastening to the roof, preserving its integrity.
What Are Adjustable Deck Pedestals?
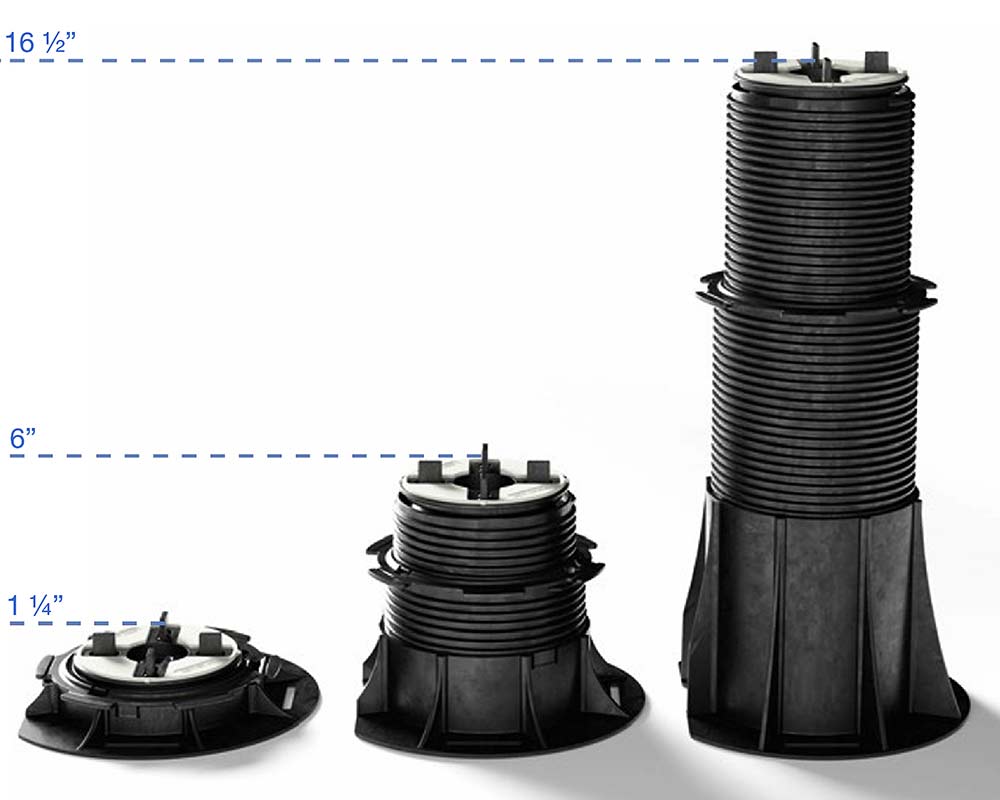 Adjustable deck pedestals such as Archatrak ‘Prime’ pedestals which have screwed columns to raise or lower their height, are used to elevate and level decking surfaces, especially on uneven or sloped substrates. They typically have a broad circular or square flat base, a screwed or fixed height central column and a head component with either inbuilt spacer tabs for paver installation or brackets to attach wood bearers for more conventional wood or composite wood decks. Screwed columns allow for precise height adjustments, ensuring a level deck surface without the need for extensive structural work. Most pedestals are made of plastic materials, but steel pedestals such as Archatrak’s ‘Incendio’ non-combustible pedestals are also available for regions with strict fire regulations.
What Are the Benefits of Adjustable Pedestals in Rooftop Deck Construction?
Using adjustable deck pedestals on rooftops facilitates the creation of a level decking surface without penetrating or damaging the roofing membrane, avoiding water leaks, and reducing the weight on the roof compared with a more traditional support system of wood or steel joists, and provides a clean, modern aesthetic. Installation of this ‘floating’ deck system is generally much quicker with adjustable height pedestals since they only need to be placed in position – no substructure needed to be built.
Adjustable pedestals also enable precise height adjustments to compensate for sloped surfaces to be made very easily, simply by screwing the pedestals up or down, ensuring whatever flat roof decking material is used, the completed floating deck system will be perfectly level.
What Decking Materials Are Best for Floating Deck Installations?
Porcelain pavers are generally one of the best choices for a floating flat roof deck or rooftop patio due to their long-term durability, fade resistance, stain resistance, scratch resistance, aesthetic appeal, and resistance to all weather conditions. And they are available in an exceptionally broad range of colors and styles. The Archatrak porcelain paver range for example offers over 90 color options in 2cm thick pavers.
Other options include concrete pavers, composite decking and treated wood, depending on the desired look, installation considerations, stain resistance, weight and ongoing maintenance considerations.

How Do Floating Deck Systems Benefit Rooftop Installations?
Floating deck systems elevate unit pavers or other decking materials above the roof surface without being fixed to it, avoiding any penetration of the roofing membrane. The broad flat base of the support pedestals spreads the weight of decking evenly and prevents damage. The modular nature of the floating deck system allows for easier and quicker installation compared with a bearer supported system and permits easy maintenance access to the rooftop surface if needed.
Another benefit of a floating roof deck system is that the air gap between the rooftop surface and the pavers can provide some cooling effect and can consequently reduce energy bills.
What is the Typical Lifespan of a Rooftop Deck Built with Adjustable Pedestals and Porcelain Pavers?
When properly installed and maintained, floating deck systems can last several decades. Porcelain pavers are known for their longevity and low maintenance requirements, while high-quality pedestals are also designed to withstand exterior conditions over the long term.
What Permits Are Required for Rooftop Deck Construction?
Since the floating deck system is not directly attached to the building structure, you will not generally need a permit other than to ensure compliance with any fire codes, perimeter structures and heights specifications and any regulations concerning wind uplift. However, you must always check with local authorities before commencing any rooftop patio construction project.
Can I Install a Rooftop Deck Myself?
Building a flat roof deck with pedestal paver system is much less challenging that building a deck with wood planks laid over bearers. Nevertheless, you will need a saw to cut some pavers, mainly around the perimeter, and if using porcelain pavers, it is preferable to use a professional wet saw. This task is somewhat simpler with wood pavers as these can be cut with a normal hand saw or power saw.
Step-by-Step Guide to Building a Level Floating Deck on a Roof
-
Assess Your Roof’s Suitability
Before starting the installation process, you should always consult a structural engineer or roofing professional to ensure your roof can support the additional load of the deck, furniture, and people. Roofs typically have weight-bearing limits, so understanding this is crucial for safety.
Verify the condition of the roof membrane, as it acts as a waterproof barrier. If it’s worn or damaged, consider repairs or the installation of a protective underlayment before proceeding.
-
Select the Materials
Choosing the right materials for flat roof decking is key to a durable and functional rooftop deck:
- Pavers:

Porcelain or concrete pavers are generally the best option for elevated decks or rooftop patio construction as they are easily installed over pedestals. Concrete is a lot heavier than porcelain and can thus be more difficult to move onto site. Porcelain pavers offer a much broader range of color options, with Archatrak wood look pavers being a very popular option especially where fire resistance is an issue. Porcelain pavers are also available in a broad range of sizes including Archatrak’s 8”, 12” and 16” porcelain planks up to 48” long. With pavers, wind uplift is a factor to consider in windy locations. - Wood Tiles:
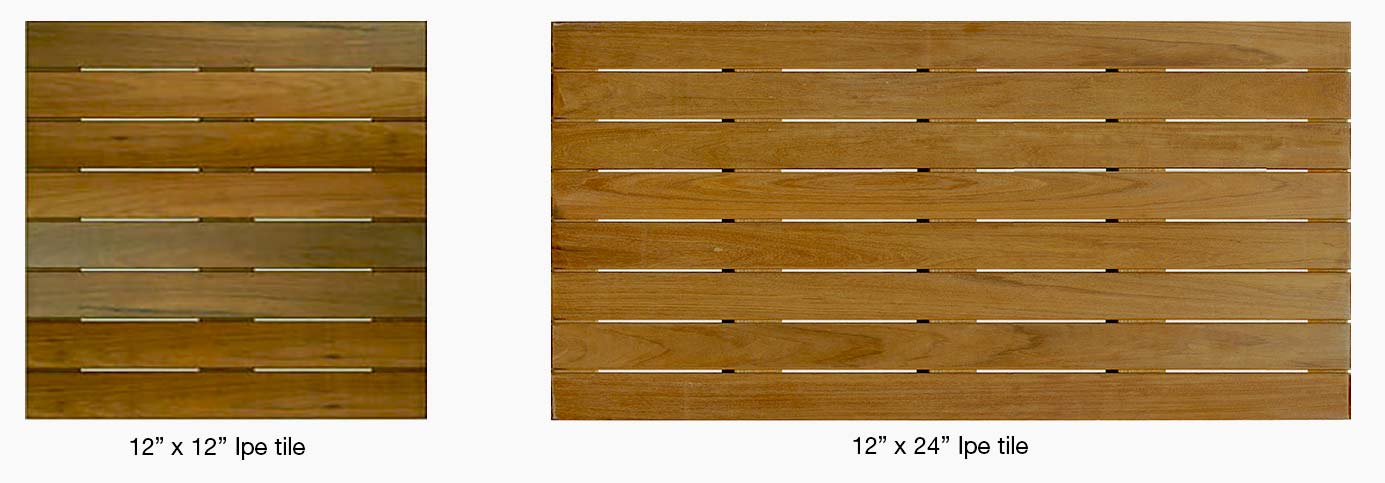
Structural wood tiles such as Archatrak’s 24″ x 24″ and 24″ x 48″ FSC certified Ipe wood tiles supported by pedestals are a popular choice where the look of traditional wood look deck is desired but avoiding the cost and difficulty of building a conventional steel or wood sub structure. Wood tiles are much lighter than concrete and are generally preferred when low roof loadings are important. In windy locations the tiles can be held together in a contiguous array with lock down screw and washer assemblies fitted in the corner of the tiles during the installation process. - Wood or Composite Wood Planks:
Conventional wood or composite wood planks can also be used with floating deck systems. Most adjustable pedestal systems can be supplied with an optional head bracket, on which wood bearers can be fixed and held in place with screws. The pedestal supported bearers are laid over the deck just like conventional bearers with spacing between the bearers governed by the decking material used and local building regulations. - Tools and Equipment: Another of the key benefits of a floating deck installation is that very little cutting or fabricating takes place on site during the installation process. Apart from cutting pavers or wood tiles to fit around the perimeter, no other on-site fabrication is required. The main task in building a floating deck is ensuring the surface is level, with precise and consistent gaps between pavers and is free from any movement.
-
Plan the Deck Layout
Sketch out the design of your deck, keeping in mind the roof’s size, shape, and any obstacles like vents, skylights, or drainage systems. Ensure proper spacing for drainage pathways and access to maintenance points.
Consider the slope of the roof during planning; the deck’s layout should work with the roof’s drainage system, not obstruct it.
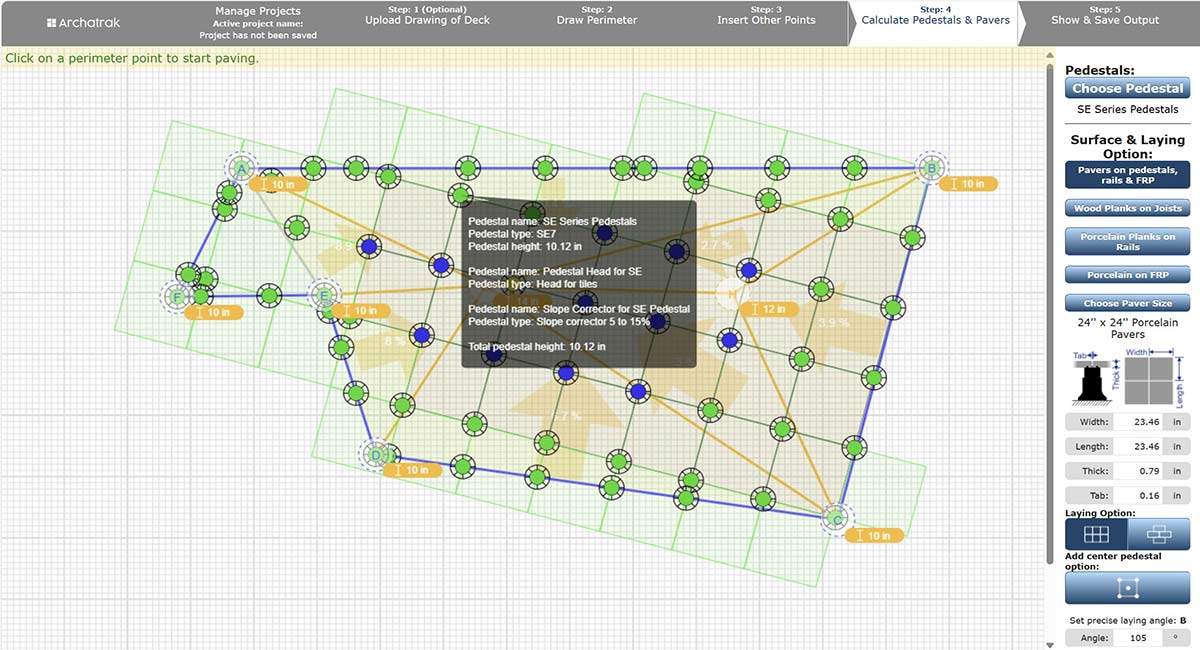
Check if the pedestal supplier has online pedestal and paver estimating software that can help considerably in estimating how many pavers and pedestals you will need. Archatrak’s pedestal and paver estimator for example can give you an accurate estimate of both pavers and pedestals and provide a print out showing the heights and locations of all pedestals, the optimum laying configuration and much more.
-
Prepare the Roof Surface
At the very start of the installation process, make sure to clean the roof thoroughly, removing debris and ensuring a smooth surface. Place protective pads (if being used) under each pedestal to minimize the possibility of any damage to the roof membrane and ensure an anti-slip base for the supports.
-
Lay Out the Adjustable Deck Pedestals
The pedestals are the foundation of your floating deck. Here’s how to install them:
- Position the Pedestals
Arrange the pedestals in a grid pattern based on the size of the pavers. Typical spacing is 24 inches in both directions, depending on the paver size and thickness. - Adjust for Slope of the Substrate
It’s best to use pedestals that have built-in slope correction capabilities, preferably with tilting heads that provide automatic adjustment without needing any add-in components. These allow you to offset the roof’s incline (typically 2%) and create a level surface. Screw the central column of the pedestals either up or down to adjust heights using a spirit level across the deck surface to ensure accuracy.
-
Lay Out the Pavers
Once the pedestals are positioned and adjusted:
- Place the Pavers: Place the pavers onto the pedestal heads, ensuring they are butted tightly against the upright tabs on the pedestal heads. The tabs not only ensure precise gapping but allow water to flow freely off the deck.
- Check for Level: Continuously check that the pavers are level using a spirit level or laser level as you progress across the deck.
-
Ensure Proper Drainage
Maintaining the roof’s drainage functionality is critical. One of the unique benefits of adjustable pedestals is that can create a perfectly level deck surface while preserving the roof’s slope beneath. Ensure that water can flow unobstructed to drains or scuppers by leaving clear pathways beneath the deck and making sure pedestals do not cover any drains.
-
Final Adjustments and Finishing Touches
After all the pavers have been laid, check carefully that no pavers are rocking, that all gaps are even and that there is only ¼”-3/8” gap between the paver edge and the wall.
Adjustable pedestals such are Archatrak’s ‘Prime’ series pedestals can be adjusted in height even after installation by using a special tool inserted into the head of the pedestal where four pavers intersect.
Ensuring Safety and Security
- Edge Restraint: On elevated decks it is very important that the decking is constrained by a low parapet or other means to prevent pavers from shifting over time. The gap between the parapet wall and the perimeter pavers should be no more than 3/8”. To ensure a tight fit, you can install spring loaded perimeter spacer clips which are mounted under the pavers on top of the pedestal heads
- Railings and Safety Features: Install railings or barriers for safety, especially if the deck is elevated. Use systems compatible with floating decks to avoid roof penetration.
Maintenance Tips for Your Floating Rooftop Deck
To keep your deck in top condition:
- Inspect Periodically: Check the stability of deck supports and the condition of pavers regularly.
- Clean the Deck Surface: Remove debris and clean pavers to prevent staining or moss growth.
- Monitor Drainage: Ensure drainage pathways remain unobstructed to avoid water pooling.
- Check the Roof Membrane: Periodically inspect the membrane for any signs of damage beneath the deck.
Summary
Building a floating roof deck on a flat roof using adjustable deck supports and pavers is an efficient and stylish solution for expanding your outdoor living space. This method simplifies construction, preserves roof integrity, and delivers a durable, low-maintenance deck. By following the steps outlined in this guide, you can create a rooftop retreat that combines functionality with aesthetic appeal, transforming your roof into a beautiful and versatile space.